
Today, I will show you how I created my first Chrome extension using ChatGPT. First, I opened ChatGPT and asked, “Give me some ideas for a simple Chrome extension that will be SEO-related.” ChatGPT gave me an elementary Chrome extension idea that I can develop into something more complex later.

Here was the task:
- Create a manifest.json file for your extension, specifying the necessary permissions and content script settings.
- Develop a content script to access the current webpage’s title tag using JavaScript.
- Implement a function that checks the length of the title tag and compares it to the recommended length (e.g., 50-60 characters).
- Provide a user interface (UI) for the extension, such as a browser action popup or a sidebar where users can view the results.
- Display a message or color code the UI by analyzing the title tag’s length. For example, if the title tag is too long, display a warning message or highlight the field in red.
- Optionally, you can enhance the functionality by including checks for keyword presence or other SEO factors in the title tag.
It was an effortless task. We are aware that creating a Chrome extension involves several steps and requirements. If you know web development programming, it will be easier for you.
Now, ChatGPT started writing the extension code with instructions. It was an exciting task for me, and I immensely enjoyed it.
Set up your development environment:
- Install a text editor or integrated development environment (IDE) for coding.
- Make sure you have the latest version of Chrome installed.
Create a new project folder for your extension.
Create a manifest.json file:
- In the project folder, create a new file called manifest.json.
- Add the necessary manifest fields. Here’s a minimal example to get started:
{
"manifest_version": 2,
"name": "Simple SEO Checker",
"version": "1.0",
"description": "A simple Chrome extension for checking page titles.",
"permissions": ["activeTab"],
"browser_action": {
"default_popup": "popup.html",
"default_icon": {
"16": "icon16.png",
"48": "icon48.png",
"128": "icon128.png"
}
},
"icons": {
"16": "icon16.png",
"48": "icon48.png",
"128": "icon128.png"
}
}
Create the HTML files:
- Create a new file called popup.html in the project folder.
- Design the UI for your extension’s popup using HTML and CSS. You can include a heading, a message area for displaying results, and any other elements you want to add.
Create the JavaScript file:
- Create a new file called popup.js in the project folder.
- Add JavaScript code to interact with the DOM, retrieve the current page’s title, perform SEO checks, and update the UI accordingly.
Add CSS styling:
- Create a new file called popup.css in the project folder.
- Write CSS rules to style your extension’s popup UI.
Prepare the icon files:
- Create three PNG files named icon16.png, icon48.png, and icon128.png in the project folder. These files will serve as icons for your extension.
Load the extension in Chrome:
- Open Chrome and go to the Extensions page (chrome://extensions).
- Enable “Developer mode” using the toggle switch.
- Click on “Load unpacked” and select your project folder.
Test your extension:
- Open a webpage and click on your extension’s icon in the browser toolbar to open the popup.
- Verify that the title checks are performed correctly and the UI updates accordingly.
Now I told him to write popup.js
// Retrieve the current active tab
chrome.tabs.query({ active: true, currentWindow: true }, function (tabs) {
  var currentTab = tabs[0];

  // Get the page title from the active tab
  var pageTitle = currentTab.title;

  // Perform SEO checks on the page title
  var titleLength = pageTitle.length;
  var maxLength = 60; // Define the maximum allowed title length

  // Display the results in the popup UI
  var titleResult = document.getElementById('title-result');
  titleResult.textContent = `Title Length: ${titleLength}/${maxLength}`;

  if (titleLength > maxLength) {
    titleResult.style.color = 'red'; // Display a warning message if the title is too long
  }
});
Now I told him to write popup.html
<!DOCTYPE html>
<html>
<head>
<meta charset="UTF-8">
<title>Simple SEO Checker</title>
<link rel="stylesheet" type="text/css" href="popup.css">
http://popup.js
</head>
<body>
<h1>Simple SEO Checker</h1>
<div id="result-container">
<h2>Title Check:</h2>
<p id="title-result"></p>
</div>
</body>
</html>
Then I told him to write popup.css
/* Reset default styles */
body, h1, h2, p {
  margin: 0;
  padding: 0;
}

body {
  font-family: Arial, sans-serif;
  font-size: 14px;
  width: 300px;
}

h1 {
  font-size: 18px;
  margin-bottom: 20px;
  text-align: center;
}

#result-container {
  margin-top: 20px;
}

h2 {
  font-size: 16px;
  margin-bottom: 10px;
}

p {
  font-size: 14px;
  line-height: 1.4;
}

#title-result {
  margin-left: 10px;
}
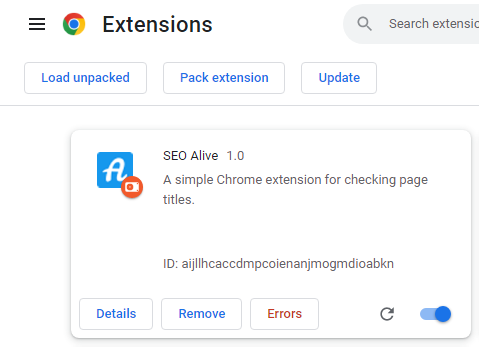
Then, he suggested keeping all the files in the same directory. I followed his advice and loaded this extension into Chrome. Initially, I encountered an error, but it was my fault as I forgot to include the icon16.png, icon48.png, and icon128.png files. Once I had them, the extension loaded successfully and worked fine.
I have a bigger plan for my Chrome extension. I want to develop it specifically for SEO users, with a wide range of functions. Thankfully, ChatGPT has saved me a lot of time. With its help, I can create a powerful SEO extension in a short amount of time.

You must be logged in to post a comment.